4.5.1 Intent的基本使用
本节引言:
在上一节结束后意味着Android的四大组件我们都已经学习完毕了~,而本节我们要学习的是四大组件间的 枢纽——Intent(意图),Android通信的桥梁,比如我们可以通过:
- startActivity(Intent)/startActivityForResult(Intent):来启动一个Activity
- startService(Intent)/bindService(Intent):来启动一个Service
- sendBroadcast:发送广播到指定BroadcastReceiver
- 另外别忘了我们在注册四大组件时,写得很多的Intent-Filter哦~
好吧,话不多说,开始本节内容!另外前面我们已经用过Intent了,就不在讲述概念性的东西了~ 老规矩,官方API:Intent
1.显式Intent与隐式Intent的区别
- 显式Intent:通过组件名指定启动的目标组件,比如startActivity(new Intent(A.this,B.class)); 每次启动的组件只有一个~
- 隐式Intent:不指定组件名,而指定Intent的Action,Data,或Category,当我们启动组件时, 会去匹配AndroidManifest.xml相关组件的Intent-filter,逐一匹配出满足属性的组件,当不止一个满足时, 会弹出一个让我们选择启动哪个的对话框~
2.Intent的七个属性:
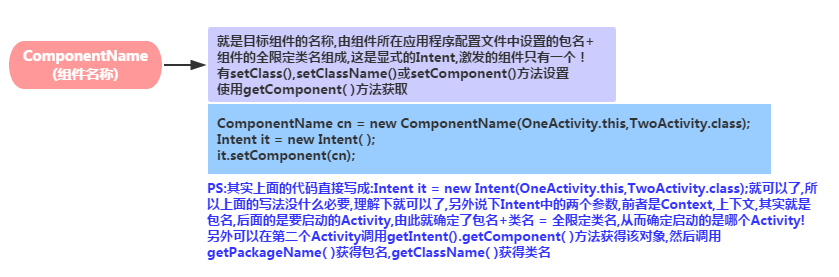
1)ComponentName(组件名称)
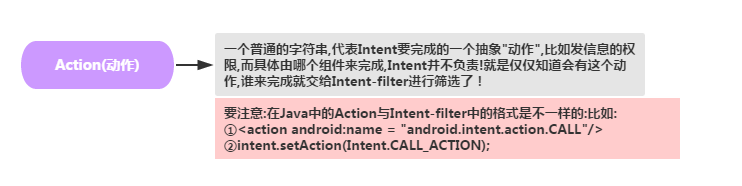
2)Action(动作)
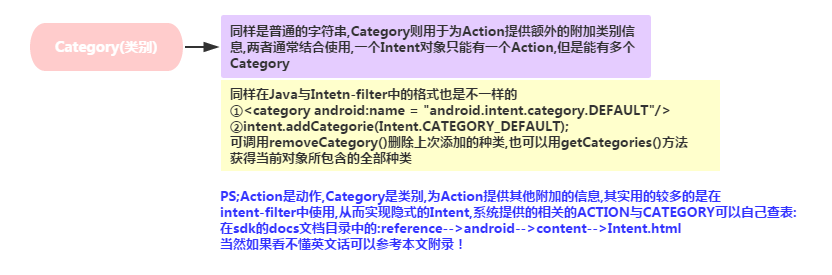
3)Category(类别)
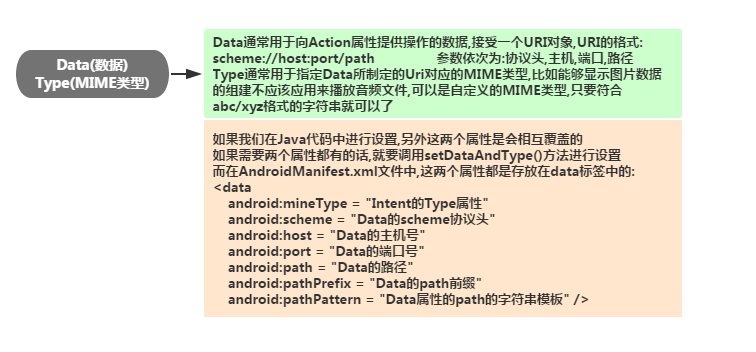
4)Data(数据),Type(mime类型)
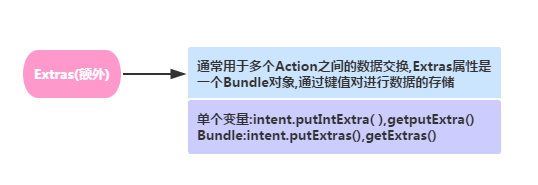
5)Extras(额外)
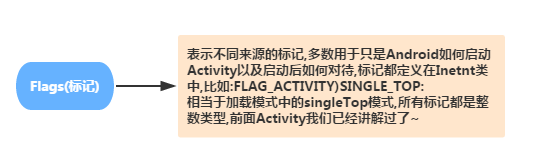
6)Flags(标记)
3.显式Intent使用示例:
这个用得很多,直接就上例子了:
例子1:点击按钮返回Home界面: 运行效果图:
核心代码:
Intent it = new Intent();
it.setAction(Intent.ACTION_MAIN);
it.addCategory(Intent.CATEGORY_HOME);
startActivity(it);
例子2:点击按钮打开百度页面: 运行效果图:
核心代码:
Intent it = new Intent();
it.setAction(Intent.ACTION_VIEW);
it.setData(Uri.parse("Http://www.baidu.com"));
startActivity(it);
4.隐式Intent详解
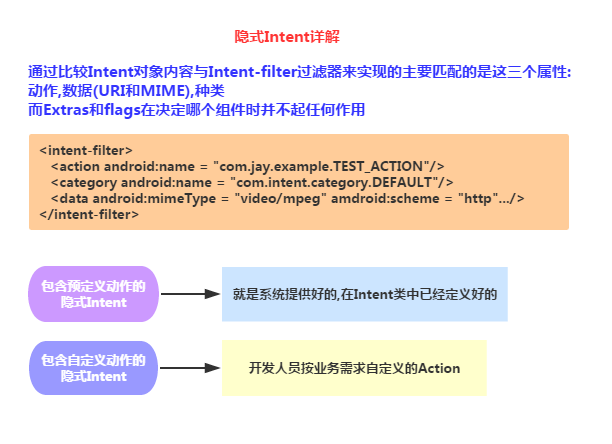
1)预定义动作的隐式Intent示例:
代码示例:点击按钮后,所有Action为VIEW的Activity被筛选出来,由用户进一步选择:
核心代码:
建立第二个Activity的布局,与对应的Activity,在第一个Activity的按钮点击事件中添加一下代码:
Intent it = new Intent();
it.setAction(Intent.ACTION_VIEW);
startActivity(it);
最后在第二个Activity的Intent中添加以下代码:
<activity android:name=".SecondActivity"
            android:label="第二个Activity">
    <intent-filter>
        <action android:name="android.intent.action.VIEW"/>
        <category android:name="android.intent.category.DEFAULT"/>
    </intent-filter>
 </activity>
运行效果图:
2)自定义动作的隐式Intent示例:
代码示例:使用自定义的Action与category来激活另一个Activity
核心代码: 建立第二个Activity的布局,与对应的Activity,在第一个Activity的按钮点击事件中添加一下代码:
Intent it = new Intent();
it.setAction("my_action");
it.addCategory("my_category");
startActivity(it);
最后在第二个Activity的Intent中添加以下代码:
<activity android:name=".SecondActivity"
        android:label="第二个Activity">
    <intent-filter>
        <action android:name="my_action"/>
        <category android:name="my_category"/>
        <category android:name="android.intent.category.DEFAULT"/>
    </intent-filter>
</activity>
注意虽然我们自定义了一个category,但是还是要把这个默认的加上,不然会报错的:
<category android:name="android.intent.category.DEFAULT"/>
5.常用系统Intent合集
大家贴下常用的系统Intent的合集吧,上面没有的欢迎提出~
//===============================================================
//1.拨打电话
// 给移动客服10086拨打电话
Uri uri = Uri.parse("tel:10086");
Intent intent = new Intent(Intent.ACTION_DIAL, uri);
startActivity(intent);

//===============================================================

//2.发送短信
// 给10086发送内容为“Hello”的短信
Uri uri = Uri.parse("smsto:10086");
Intent intent = new Intent(Intent.ACTION_SENDTO, uri);
intent.putExtra("sms_body", "Hello");
startActivity(intent);

//3.发送彩信(相当于发送带附件的短信)
Intent intent = new Intent(Intent.ACTION_SEND);
intent.putExtra("sms_body", "Hello");
Uri uri = Uri.parse("content://media/external/images/media/23");
intent.putExtra(Intent.EXTRA_STREAM, uri);
intent.setType("image/png");
startActivity(intent);

//===============================================================

//4.打开浏览器:
// 打开百度主页
Uri uri = Uri.parse("http://www.baidu.com");
Intent intent  = new Intent(Intent.ACTION_VIEW, uri);
startActivity(intent);

//===============================================================

//5.发送电子邮件:(阉割了Google服务的没戏!!!!)
// 给someone@DOMain.com发邮件
Uri uri = Uri.parse("mailto:someone@domain.com");
Intent intent = new Intent(Intent.ACTION_SENDTO, uri);
startActivity(intent);
// 给someone@domain.com发邮件发送内容为“Hello”的邮件
Intent intent = new Intent(Intent.ACTION_SEND);
intent.putExtra(Intent.EXTRA_EMAIL, "someone@domain.com");
intent.putExtra(Intent.EXTRA_SUBJECT, "Subject");
intent.putExtra(Intent.EXTRA_TEXT, "Hello");
intent.setType("text/plain");
startActivity(intent);
// 给多人发邮件
Intent intent=new Intent(Intent.ACTION_SEND);
String[] tos = {"1@abc.com", "2@abc.com"}; // 收件人
String[] ccs = {"3@abc.com", "4@abc.com"}; // 抄送
String[] bccs = {"5@abc.com", "6@abc.com"}; // 密送
intent.putExtra(Intent.EXTRA_EMAIL, tos);
intent.putExtra(Intent.EXTRA_CC, ccs);
intent.putExtra(Intent.EXTRA_BCC, bccs);
intent.putExtra(Intent.EXTRA_SUBJECT, "Subject");
intent.putExtra(Intent.EXTRA_TEXT, "Hello");
intent.setType("message/rfc822");
startActivity(intent);

//===============================================================

//6.显示地图:
// 打开Google地图中国北京位置(北纬39.9,东经116.3)
Uri uri = Uri.parse("geo:39.9,116.3");
Intent intent = new Intent(Intent.ACTION_VIEW, uri);
startActivity(intent);

//===============================================================

//7.路径规划
// 路径规划:从北京某地(北纬39.9,东经116.3)到上海某地(北纬31.2,东经121.4)
Uri uri = Uri.parse("http://maps.google.com/maps?f=d&saddr=39.9 116.3&daddr=31.2 121.4");
Intent intent = new Intent(Intent.ACTION_VIEW, uri);
startActivity(intent);

//===============================================================

//8.多媒体播放:
Intent intent = new Intent(Intent.ACTION_VIEW);
Uri uri = Uri.parse("file:///sdcard/foo.mp3");
intent.setDataAndType(uri, "audio/mp3");
startActivity(intent);

//获取SD卡下所有音频文件,然后播放第一首=-=
Uri uri = Uri.withAppendedPath(MediaStore.Audio.Media.INTERNAL_CONTENT_URI, "1");
Intent intent = new Intent(Intent.ACTION_VIEW, uri);
startActivity(intent);

//===============================================================

//9.打开摄像头拍照:
// 打开拍照程序
Intent intent = new Intent(MediaStore.ACTION_IMAGE_CAPTURE);
startActivityForResult(intent, 0);
// 取出照片数据
Bundle extras = intent.getExtras();
Bitmap bitmap = (Bitmap) extras.get("data");

//另一种:
//调用系统相机应用程序,并存储拍下来的照片
Intent intent = new Intent(MediaStore.ACTION_IMAGE_CAPTURE);
time = Calendar.getInstance().getTimeInMillis();
intent.putExtra(MediaStore.EXTRA_OUTPUT, Uri.fromFile(new File(Environment
.getExternalStorageDirectory().getAbsolutePath()+"/tucue", time + ".jpg")));
startActivityForResult(intent, ACTIVITY_GET_CAMERA_IMAGE);

//===============================================================

//10.获取并剪切图片
// 获取并剪切图片
Intent intent = new Intent(Intent.ACTION_GET_CONTENT);
intent.setType("image/*");
intent.putExtra("crop", "true"); // 开启剪切
intent.putExtra("aspectX", 1); // 剪切的宽高比为1:2
intent.putExtra("aspectY", 2);
intent.putExtra("outputX", 20); // 保存图片的宽和高
intent.putExtra("outputY", 40);
intent.putExtra("output", Uri.fromFile(new File("/mnt/sdcard/temp"))); // 保存路径
intent.putExtra("outputFormat", "JPEG");// 返回格式
startActivityForResult(intent, 0);
// 剪切特定图片
Intent intent = new Intent("com.android.camera.action.CROP");
intent.setClassName("com.android.camera", "com.android.camera.CropImage");
intent.setData(Uri.fromFile(new File("/mnt/sdcard/temp")));
intent.putExtra("outputX", 1); // 剪切的宽高比为1:2
intent.putExtra("outputY", 2);
intent.putExtra("aspectX", 20); // 保存图片的宽和高
intent.putExtra("aspectY", 40);
intent.putExtra("scale", true);
intent.putExtra("noFaceDetection", true);
intent.putExtra("output", Uri.parse("file:///mnt/sdcard/temp"));
startActivityForResult(intent, 0);

//===============================================================

//11.打开Google Market
// 打开Google Market直接进入该程序的详细页面
Uri uri = Uri.parse("market://details?id=" + "com.demo.app");
Intent intent = new Intent(Intent.ACTION_VIEW, uri);
startActivity(intent);

//===============================================================

//12.进入手机设置界面:
// 进入无线网络设置界面(其它可以举一反三)
Intent intent = new Intent(android.provider.Settings.ACTION_WIRELESS_SETTINGS);
startActivityForResult(intent, 0);

//===============================================================

//13.安装apk:
Uri installUri = Uri.fromParts("package", "xxx", null);
returnIt = new Intent(Intent.ACTION_PACKAGE_ADDED, installUri);

//===============================================================

//14.卸载apk:
Uri uri = Uri.fromParts("package", strPackageName, null);
Intent it = new Intent(Intent.ACTION_DELETE, uri);
startActivity(it);

//===============================================================

//15.发送附件:
Intent it = new Intent(Intent.ACTION_SEND);
it.putExtra(Intent.EXTRA_SUBJECT, "The email subject text");
it.putExtra(Intent.EXTRA_STREAM, "file:///sdcard/eoe.mp3");
sendIntent.setType("audio/mp3");
startActivity(Intent.createChooser(it, "Choose Email Client"));

//===============================================================

//16.进入联系人页面:
Intent intent = new Intent();
intent.setAction(Intent.ACTION_VIEW);
intent.setData(People.CONTENT_URI);
startActivity(intent);

//===============================================================


//17.查看指定联系人:
Uri personUri = ContentUris.withAppendedId(People.CONTENT_URI, info.id);//info.id联系人ID
Intent intent = new Intent();
intent.setAction(Intent.ACTION_VIEW);
intent.setData(personUri);
startActivity(intent);

//===============================================================

//18.调用系统编辑添加联系人(高版本SDK有效):
Intent it = newIntent(Intent.ACTION_INSERT_OR_EDIT);
it.setType("vnd.android.cursor.item/contact");
//it.setType(Contacts.CONTENT_ITEM_TYPE);
it.putExtra("name","myName");
it.putExtra(android.provider.Contacts.Intents.Insert.COMPANY, "organization");
it.putExtra(android.provider.Contacts.Intents.Insert.EMAIL,"email");
it.putExtra(android.provider.Contacts.Intents.Insert.PHONE,"homePhone");
it.putExtra(android.provider.Contacts.Intents.Insert.SECONDARY_PHONE,"mobilePhone");
it.putExtra( android.provider.Contacts.Intents.Insert.TERTIARY_PHONE,"workPhone");
it.putExtra(android.provider.Contacts.Intents.Insert.JOB_TITLE,"title");
startActivity(it);

//===============================================================

//19.调用系统编辑添加联系人(全有效):
Intent intent = newIntent(Intent.ACTION_INSERT_OR_EDIT);
intent.setType(People.CONTENT_ITEM_TYPE);
intent.putExtra(Contacts.Intents.Insert.NAME, "My Name");
intent.putExtra(Contacts.Intents.Insert.PHONE, "+1234567890");
intent.putExtra(Contacts.Intents.Insert.PHONE_TYPE,Contacts.PhonesColumns.TYPE_MOBILE);
intent.putExtra(Contacts.Intents.Insert.EMAIL, "com@com.com");
intent.putExtra(Contacts.Intents.Insert.EMAIL_TYPE, Contacts.ContactMethodsColumns.TYPE_WORK);
startActivity(intent);

//===============================================================

//20.打开另一程序
Intent i = new Intent();
ComponentName cn = new ComponentName("com.example.jay.test",
"com.example.jay.test.MainActivity");
i.setComponent(cn);
i.setAction("android.intent.action.MAIN");
startActivityForResult(i, RESULT_OK);

//===============================================================

//21.打开录音机
Intent mi = new Intent(Media.RECORD_SOUND_ACTION);
startActivity(mi);

//===============================================================

//22.从google搜索内容
Intent intent = new Intent();
intent.setAction(Intent.ACTION_WEB_SEARCH);
intent.putExtra(SearchManager.QUERY,"searchString")
startActivity(intent);

//===============================================================
6.Action在哪里查?
本来想直接贴以前收集到的Intent Action的,后来想想还是算了,授之以鱼,还不如授之以渔, 如果你下载了Android的文档的话,可以在下述路径:
sdk-->docs-->reference-->android--->content--->Intent.HTML
找到这个玩意,然后从这个Constants开始就是了:
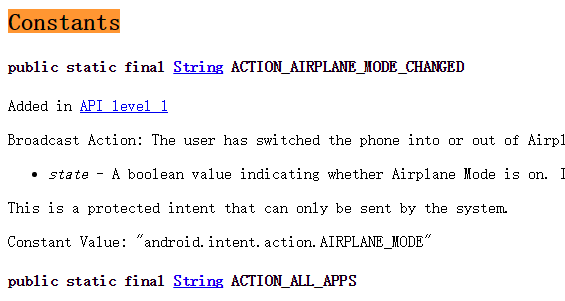
遇到陌生的自己来这里查即可~
本节小结:
好的,关于Intent的基本使用就到这里,下一节我们会来继续学习在日常开发中使用Intent可能会遇到 的一些问题或者说需求吧,敬请期待,谢谢~